Tuesday, November 1, 2011

Tip 10 (Week 10 Fall 2011): Scheduling Assistant

If you have ever tried to schedule a meeting for more than a few people you know that it can be a bit of pain. Even if you have permission to view all of the attendees calendars, looking at all of their schedules to find a workable time for the meeting can take up a lot of time. That’s why this Tech Tip is all about the Scheduling Assistant.

In the video below, I walk you through arranging a meeting using the Scheduling Assistant. It also shows you how to use the tool for finding a meeting room in the library.

Bonus tip: Of course, this only works with those who are in the Ohio University system. If you need to schedule a meeting with multiple people outside of OU (such as for a statewide or OhioLINK committee), you might want to give Doodle a try. It lets you ask people to specify available times from a pre-set list and lets you choose the time that works for the greatest number of people.

Note: The video will probably look best (and be most legible) viewed in full screen mode.


To complete this tip watch the video and mark yourself off the checklist. 

Post Author: Jessica Hagman

Saturday, October 29, 2011

Tip 9 (Week 9 Fall 2011): Annex Requests through ALICE & General Annex Info

Depository Hours 8-5 Mon-Fri

Courier Delivery Schedule 

Monday through Friday Courier Deliveries are at 10 a.m. and 3 p.m.
Requests must be in the ALICE request queue by...
8:00 a.m. for the 10 a.m. delivery, or
1:00 p.m. for the 3 p.m. delivery
The items you request will be delivered to Alden Library's Circulation Desk for pickup within 48 hours.
Locating Materials
You can request materials located at the Library Annex through ALICE.


The items you request will be delivered to Alden Library's Circulation Desk within 48 hours. Most items are delivered the same day as requested.

Loan Policies
With the exception of materials designated as non-circulating or building-use only, items in the Annex may be checked out. Bound periodicals may be borrowed for one week by all users. Monographs circulate according to an individual's patron status.
Services
A Reading Room with study tables and carrels for 12 readers is available for faculty and students. A public PC, photocopy machine, microfilm and microfiche readers are also available. Materials are retrieved for users by depository staff. The shelving arrangement does not allow subject browsing. Reference collections and other library services are not available. Eating, drinking, and smoking are not permitted in the building.

To complete this Tech Tip, please locate an item housed in the Annex and have it delivered to your location of choice.

Post Author: Terri Nelson


Thursday, October 27, 2011

Tip 8 (Week 8 Fall 2011): Easy formatting to make a wiki page look great

The staff wiki has been around for awhile now, so most of you probably know how to create a basic page. Ready for something a little extra that will easily add “oomph” and make people sit up and take notice?

NOTE: even if you have never created a wiki page, you can still accomplish this exercise with great success!

What is formatting a wiki page and why would I want to do it?

Formatting a wiki page simply means creating section headings in bolder or larger font, using italics, or adding bullet points, numbering and such. Doing this is good for a number of reasons, but the main reason is -- its easier to read!

     sections will be separated by headings that stand out
     bullets and numbering makes lists less confusing
     bold type and italics can emphasize words or sentences

Here are some examples of what formatting can do:

Example 1:  Boring formatting

Excerpt from L. Frank Baum’s The Wizard of Oz

"Kill the Wicked Witch of the West," answered Oz. "But I cannot!" exclaimed Dorothy, greatly surprised. "You killed the Witch of the East and you wear the silver shoes, which bear a powerful charm.  There is now but one Wicked Witch left in all this land, and when you can tell me she is dead I will send you back to Kansas--but not before." The little girl began to weep, she was so much disappointed; and the eyes winked again and looked upon her anxiously, as if the Great Oz felt that she could help him if she would. "I never killed anything, willingly," she sobbed.  "Even if I wanted to, how could I kill the Wicked Witch?

Example 2: Better formatting

Excerpt from L. Frank Baum’s The Wizard of Oz

"Why should I do this for you?" asked the Lady. "Because you are wise and powerful, and no one else can help me," answered the Scarecrow.
     "I never grant favors without some return," said Oz; "but this much I will promise. 
     If you will kill for me the Wicked Witch of the West, I will bestow upon you a great many brains, and such good brains that you will be the wisest man in all the Land of Oz."
     "I thought you asked Dorothy to kill the Witch," said the Scarecrow, in surprise.

"So I did.  I don't care who kills her.  But until she is dead I will not grant your wish.  Now go, and do not seek me again until you have earned the brains you so greatly desire."
1.    The Scarecrow went sorrowfully back to his friends and told them what Oz had said
2.    Dorothy was surprised to find that the Great Wizard was not a Head, as she had seen him, but a lovely Lady.

"All the same," said the Scarecrow, "she needs a heart as much as the Tin Woodman."

-------------------------------------------------------------------------------------------------------------------------

So let’s get to it and improve some text.  For the next part of this exercise, you will have to go to the staff wiki, to a page called the “Wiki Sandbox.”  This is where you can see how the formatting works and try it out yourself.


You have completed this Tech Tip when: you have gone to the wiki page above (or another wiki page you want to work on) and tried out some formatting tips to make headings, bullets, etc.


Post Author: Diana Nichols

Thursday, October 20, 2011

Tip 7 (Week 7 Fall 2011): LibGuides

What are LibGuides and can I make one?

LibGuides have replaced the old “subject guides” that “bibliographers” used to make. Now we’d say that “the subject liaison created a LibGuide” instead. Here’s where we list them: 


The front page looks like this: 


You can see they are subdivided by subject area, just like the old resource guides.  In the middle at the top you can also “browse all 173 guides,” which lists them alphabetically, or search them in the search box. 

One thing we decided to do early on was have a page on every guide called a “Quickstart.” This page offers the very top most important resources for that field: 1-2 databases, maybe the handiest stack locations, maybe the best encyclopedia.  Here’s an example: 


Notice also that every LibGuide highlights its author and encourages patrons to ask for help.  Suddenly, you’re a rock star!

LibGuides are easy to make – really. Each box is a premade component that you then fill-in-the-blanks.  So I might want to make a list of journals linked to their ALICE records.  I used pull-down menus to make a “lists and links” box, then click “make a link” for every title, give it a name, copy the URL, and voila, lovely list. Like this: 


Also, Tim Smith has created a “LibGuides Toolbox” which has many pre-programmed boxes for searching databases, explaining general research principles, etc., so you can just copy these into your LibGuide – a box, a tab, a page, or a whole guide is easily pirated, I mean, shared. 


You should go exploring here. It’s a gold mine. 

Not to mention a whole world of LibGuides at other institutions, guides other librarians have created, to give you more ideas than you can imagine.

But, also, there are so many things you can do with LibGuides.  They don’t have to be just a subject guide. Some libraries have made a LibGuide their homepage: one Guide to rule them all, so to speak.  We have LiGuides for help for


What other uses could you imagine?  Could your staff or students benefit from information organized in this way? If you want to make a LibGuide, contact Tim Smith to get a login, and jump right in.

Here’s your task: find a libguide on a subject that interests you.  Look at the tabs and boxes until you discover a resource you did not know existed. Open and learn about that resource. Our library is full of things we don’t even know about; learn about one new one and then you can check off this Tech Tip. 

Post Author: Sherri Saines


Wednesday, October 12, 2011

Tip 6 (Week 6 Fall 2011): Library Kindle Lending / Viewing Kindle Books on Other Devices

Though there are many different devices for viewing eBook content, this Tech Tip will solely focus on the Amazon Kindle.  If you would like more info about other e-reading devices and their functionality, it's possible we could explore that in another Tech Tip.  We're looking into the Kindle now because until Sept. 21, 2011 patrons weren't able to check out Kindle books from their library.  That has now changed.  This tip will also focus quite a bit on public library lending, however, it is extremely relevant to every library user.

http://phx.corporate-ir.net/phoenix.zhtml?c=176060&p=irol-newsArticle&ID=1608874&highlight

Ohio is a great place for the Kindle user.  The Ohio eBook project is a great resource for finding and borrowing Kindle books.

http://ohdbks.lib.overdrive.com/04CF82F6-2FA8-4644-9A26-9B03B7460E95/10/381/en/Default.htm


All the user needs is an active library card from a public library in the state of Ohio.  This tip will be written from an ACPL card member's perspective.  The activity will also be written in that manner, so if you are not an ACPL card holder, please visit someone who is and work through this together.

In addition to the public library card you'll need an Amazon account.  You can get that at amazon.com.  But, the good news is you don't need a Kindle.  You might be able to read from your mobile device,.  If a Kindle and your mobile device aren't an option, we'll talk about how to download a .pdf file to your computer at the end of the tutorial.


The first step in searching for Kindle books: place your cursor search in the search box at the top of the page.


Below you'll see the results of the search.  If there is a copy available you can have it sent to your Amazon account instantly.  If not, you can add yourself to a waiting list.  I'll go ahead and have the book sent to my Amazon account.  Try to find a book that you can send to your Amazon account.  (i.e. the book is listed as available)  If you can't locate one, add yourself to any book's wait list.


Now that you've added the book to your cart, you're ready to authenticate and place it on your Kindle/or mobile device you're using for Kindle.......or, your Amazon account.  Once, you've added all the titles you want, you'll "Proceed to Checkout."


Then choose your library affiliation.  In this case "Athens County Public Library."

You'll then choose your desired loan period.  The options are 7 & 14 days.   For this title, I'm choosing 14 days.


It's now time to authenticate with your username and password information.  ACPL requires that you replace the "P" in their patron ID with a 0. 


After entering your username and password, click "Get for Kindle."


That will open Amazon where you'll click "Get Library Book."


Amazon will ask you to authenticate.

You'll then be asked what device you'd like to send the book to.  I sent this title to my iPhone just to see if it was as seamless as the Kindle.  You can download apps for iPhone, Android, etc. free of charge in their application download stores.  Also, you can of course, have this delivered to your Amazon account and read from there.


Below is a screenshot of the Kindle library book from the iPhone interface.
To complete this task request a book and have it delivered to an Amazon Kindle, or a device that reads Kindle books.  If neither of those options suits you, please follow the steps below to download a PDF file eBook.  If you do not have a public library card (state of Ohio), please work with someone who does.

The PDF file eBook is different in it's reader, but not much in terms of requesting.  The first step in requesting a PDF format eBook is downloading a reader.  Go to Google.com and search for "Adobe Digital Editions."  Download Adobe Digital Editions.  Once the download is complete it will open as the screenshot below shows.


The steps of authentication, etc. are very similar to authenticating a Kindle title, however, it will download just as any PDF would.  After the download is complete, choose to open with Adobe Digital Editions.  Below is shot of the appropriate link being clicked for PDF download opposed to a Kindle book


Post Author: Derek Malone


Tuesday, October 4, 2011

Tip 5 (Week 5 Fall 2011): Troubleshooting Public Printer Malfunctions

Step 1: If someone logs on as Guest/Fac/Staff they will only receive the Vended Printers as an option.  To make sure the patron is logged on as themselves go to the Windows button - Click Devices and Printers to display available printers.  If only Vended options are available the patron is logged in as a Guest or Fac/Staff.


If the patron is not logged in as himself; advise patron to log off and sign back in.

Step 2: It often takes up to 10 minutes to load a print request.  Sometimes simply logging off and back on will bring up the print option quicker.


Step 3: Many times Blackboard will not print from Internet Explorer.  Try using Firefox instead.


Step 4: If you have any further questions, contact Randy Stewart for impromptu consultation.


To complete this task, visit a public computer, sign in as a Guest and go through steps 1-3.

Post Author: Steve Mowrey

Friday, September 30, 2011

Tip 4 (Week 4 Fall 2011): Using the New Microform Scanners


MICRO/SCANNER INSTRUCTIONS
 FOR GETTING STARTED

1.      Logon to computer.

For OU students and staff use: Ohio ID
For guests use: “library” and “guest1”
2.      On the screen, double click the Red Icon    
 

for PowerScan2000.
3.     When the program opens, select the image for your film type. (35mm film, microfiche, etc.)

4.      Slide the black tray toward yourself until the glass pops up. (Be sure glass is centered on the carrier.)
5. For microfilm, follow diagram on the computer screen to thread film.


Advance film using the “control box” (also on screen).

6.      Most adjustments are available under the tabs labeled “home” and “adjust” (on left side of screen)


7.      For specific instructions on each button see laminated “Quick Start” guide near the scanner.
8.      When finished, rewind film on original reel and place on gray shelves under the blue sign that says, “Return Microforms Here”.
9.      Close ScanPro program and log off computer.

If you need additional assistance, please, inquire at the service desk on this floor.

Instructions to:
Scan, save & print

1.      To create a file to print or attach to an email use this button located under the “home” tab.

2.      The scanned image will be whatever is contained inside the dotted green box on the screen.

3.      The following pop-up box will appear.
4.      If you wish to scan more images, close the box by clicking on the “X” and continue.
5.      If you are finished scanning, click on the “finish” button inside the box.
6.      To locate the file, open “My Computer” from the desktop.
7.      Open “New Volume (D:)” and locate the scan with the most recent date and time. You may now name the file; attach to email; or open it to print. 


To complete this task - visit the 1st floor - scan a micro - and save it to the D drive.  If you need any assistance, please inquire at the service desk.

Post Author: Edie Luce

Tuesday, September 20, 2011

Tip 3 (Week 3 Fall 2011): Libstats 101

Hello Alden!   This week we are going to learn about LibStats.  What is it?  Libstats is a data collection program that we use to collect data on the questions that are asked by our patrons.  Some wonder why we need to take down every question.  I know that it can be tedious when you have a line of people waiting to ask questions at the service desk, but keep in mind that LibStats is how we are able to tell how many questions are being asked of us, when they are being asked and from what method they are being asked. 

For example, the Reference department needed to decide how many librarians to staff the desk during the evening hours for the fall quarter.  So the department consulted LibStats to figure out how many questions were being asked at the desk between 5:00 pm and 10:00 pm.  Turns out they were able to shift things around a bit so now the librarians only have to stay until 9:00 pm instead of 10:00 pm. 

I would like you to go to a service desk and take a look at the program.   What you will see is something like this at the top of the page.  (Keep in mind that every desk is going to have something just a little different in regard to the categories available.)


You would now just select the proper location of where you answered the question, the question type, how long it took you to answer the question, what format did the question arrive at you, then your initials. 

The question box is to type the question that you answered.  If you are using instant messaging, email, or texting you can just copy and paste the question into the box.  Finally you can click “Save Question/Answer”.  Once you click “Save” you question and answer will be recorded and will look like this: 


There are often questions that really do not need an answer every time they are asked.  “Where are the bathrooms?” or “May I use a stapler?” do not really need to have answers.  However, the question does need to be recorded in LibStats.  I only put anything in the answer box when I get a question that I do not know the answer to or the questions that I feel the rest of the desk staff might have some benefit from having the answer. 

This is LibStats in a nutshell.  So, please go to a service desk where they have LibStats up and use the program a bit.   


Post Author: Paul Campbell

Monday, September 12, 2011

Tip 2 (Week 2 Fall 2011): Evernote - capture your thoughts everywhere

Evernote may be the digital notebook for you. Have you ever...
  • wanted to take notes on your mobile device?
  • wanted a better way to organize your information?
  • capture a page form the web (requires the add-on web clipper), add your thoughts with some text notes, and save an email from Outlook all in one place (requires installing the application on your computer)?
Access Evernote from the web, your desktop, or your mobile device (and because it is web-based all your notes stay synced without any effort on your part).

Getting Started
First let's create your account,
  1. Point your browser to http://www.evernote.com
  2. Click "Create Account" (upper right)
  3. Fill out the form and click "Register"
  4. Sign into Evernote with your newly created account


Creating your first notebook
Everyone has a notebook (think of a notebook as a file folder) called username's notebook so for me it is mtomeo's notebook. If you do not select a notebook, notes will be saved in this notebook by default.
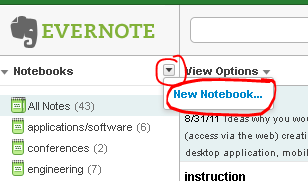
  1. Click the down arrow to the right of Notebooks (upper left) then click "New Notebook..."
  2. Enter a name for your new notebook and click "Save"


Creating your first note
  1. Select the notebook you want the note to be save in (not to worry if you save it the wrong notebook, they can be moved)
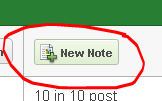
  2. Click "New Note" (upper middle)
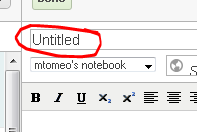
  3. Give your new note a name in the text box called "Untitled"
  4. Start entering text, grabbing web pages, inserting images, etc.


This is just the tip of the iceberg. With Evernote, you can create to do list(s), share notes with colleagues, add apps to enhance functionality, and easily find it when you need it.

Remember once you have created your notebook and your first note to put an 'x' in the Google spreadsheet. Good job!

PS If you are curious how intense Evernote can get, check out this blog post. Thank you to Tim for the link.

Post Author: Megan Tomeo

Wednesday, September 7, 2011

Tip 1 (Week 1 Fall 2011): Things to do without internet access or without a computer

THINGS TO DO WITHOUT INTERNET ACCESS OR WITHOUT A COMPUTER:
THE FIRST THING YOU MAY WANT TO DO IS TO COPY/PASTE ANY TIPS WHICH YOU LIKE INTO A WORD DOCUMENT AND PRINT IT. THAT WAY YOU WILL HAVE IT IF YOUR PC IS DOWN. YOU CAN ALSO ADD THE WORD DOCUMENT TO YOUR HOME STORAGE.

IF PC IS WORKING, BUT INTERNET IS NOT:
IF YOU HAVE ACCESS TO EMAIL, CLEAN IT UP. DELETE ANY UNWANTED EMAILS FROM YOUR INBOX AND SENT MAIL OR MOVE THEM INTO A FOLDER. BY SAVING THEM IN A FOLDER, YOU CAN STILL ACCESS THEM WITHOUT USING THE LIMITED STORAGE SPACE IN YOUR INBOX, SENT MAIL AND DELETED ITEMS.
TO CREATE A FOLDER IN EMAIL (OUTLOOK), GO TO THE FOLDER TAB (RED CIRCLE BELOW), CLICK THE "NEW FOLDER" ICON:


NAME YOUR FOLDER (FIRST RED CIRCLE BELOW),

DECIDE WHICH ITEMS YOU WANT FOR THIS FOLDER – USUALLY “MAIL AND POST ITEMS” (SECOND RED CIRCLE BELOW),

AND SELECT WHERE YOU WOULD LIKE TO STORE THIS FOLDER – I HAVE SELECTED “INBOX” (THIRD RED CIRCLE BELOW).


TO PLACE EMAILS IN YOUR FOLDER(S), SIMPLY SELECT (HIGHLIGHT) THE EMAIL  AND CLICK ON “MOVE” (FIRST RED CIRCLE BELOW).  YOU WILL NEED TO BE IN THE “HOME” TAB TO MOVE EMAILS. YOUR LIST OF AVAILABLE FOLDERS WILL APPEAR AND CLICKING ON THE APPROPRIATE ONE PLACES THE EMAIL IN THAT FOLDER.

YOU CAN ALSO DECLARE RULES SO THAT CERTAIN EMAILS AUTOMATICALLY ARE PLACED IN CERTAIN FOLDERS (SECOND RED CIRCLE BELOW).


TO ACCESS YOUR FOLDER(S), SIMPLY CLICK ON IT FROM THE LEFT HAND MENU, AS CIRCLED BELOW:


IF PC IS NOT WORKING
  • SHELVE BOOKS – TALK TO JOYCE OR LUCY.
  • SEND AN OLD-FASHIONED THANK YOU NOTE TO SOMEONE WHO DID SOMETHINGS FOR YOU.
  • MAKE A LIST OF THINGS YOU NEED TO DO WHEN YOU HAVE COMPUTER ACCESS.
  • CLEAN YOUR DESK (TOP, DRAWERS, SHELVES, KEYBOARD, ETC.)—GO THROUGH PAPERS/BOOKS AND DECIDE TO KEEP OR RECYCLE.
  • CLEAN PART OF THE STAFF LOUNGE (REFRIGERATORS, FREEZER, COUNTERTOPS, MICROWAVES, ETC.)—PERHAPS GET OTHERS IN YOUR AREA TO WORK WITH YOU
  •  WRITE DOWN ALL OF YOUR PASSWORDS, ACCESS CODES AND OTHER SENSITIVE INFORMATION. DIVIDE THE LISTS OF INFORMATION INTO CATEGORIES FOR YOUR FAMILY, BOSS, ETC., AND KEEP IN A SAFE PLACE. OR, WHEN YOU HAVE INTERNET ACCESS AGAIN, YOU CAN USE A PASSWORD MANAGER (THERE ARE FREE/PAY-TO-USE SITES).


COMPLETE THIS TECH TIP BY CREATING A FOLDER FOR EMAILS AND MOVING SOME ITEMS INTO IT, AND THEN MARKING NUMBER ONE BY YOUR NAME ON THE CHECKLIST.


Post Author: Jo Brown