Part A: Adding contacts to your calendar permissions
Let’s start by adding library staff to “calendar permissions” so you can adjust their permission levels (it has been highly recommended that all supervisors have “reviewer” level access to their staff’s calendar).
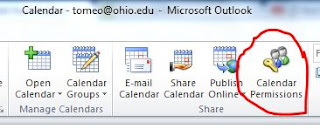
Starting from the calendar view in your Outlook:
- Click “Calendar Permissions”
- Click “Add...”
- Search for the last name of a library staff member (a)
- If the name is not already highlighted in blue, click on the name to highlight it (b)
- Click “Add->” (c)
- Repeat steps 3 to 5 for each staff member you would like to adjust their permission levels
- Click “Ok” (d)

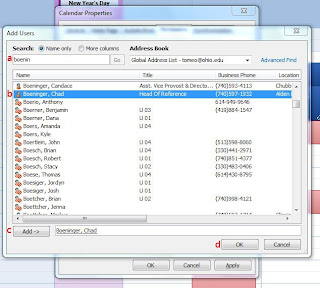
Now that everyone is in our list, let’s see how to adjust permission levels for one or more contacts.
Part B: Adjusting the permission level of your contacts
Let’s learn a little about the different permission levels. A warning, never assign anyone the permission level of “owner” as they will have access to everything and can cause havoc.
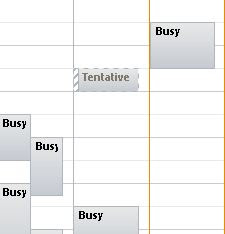
As already mentioned the two preloaded user types, default and anonymous, have a “free/busy time” permission level. When a default or anonymous user, or a person you set to this permission level views your calendar, they see that you are either free or busy.
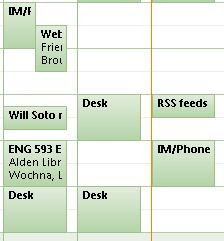
If you adjust the permission level to “free/busy time, subject, location” or “reviewer”, the viewer will see if you are free or busy as well as the details i.e., the subject and location of your appointments and meetings.
There are several more permission levels (contributor, author, editor, and the variations of author and editor). These are beyond the scope of this post because these permission levels give the contact varying ability to create, edit, and/or delete appointments and meetings. Most everyone in the library will just need to be able to read your calendar.
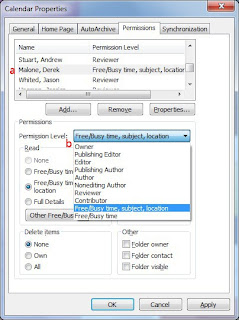
To adjust the permission level:
- Select one contact or multiple contacts by using CTRL or Shift (they will be highlighted in blue) (a)
- Select the permission level from the pull down menu (b)
- Click “Ok”
Part C: Making appointments and meetings private
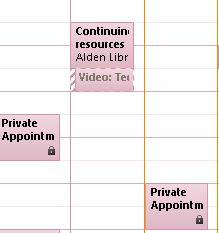
For certain appointments (e.g., doctor’s appointment), you may want everyone, regardless of their permission level, to see that you are busy and nothing else (indicated on your calendar as "private appointment").
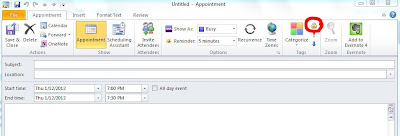
To make a meeting or appointment private:
- Create the meeting or appointment
- Click the lock icon
You can mark the tech tip complete on the Google spreadsheet after you
- added a library staff member (your supervisor, for example) to calendar permissions,
- changed the permission level for contact(s), and
- created a private appointment or meeting.
Post Author: Megan Tomeo
No comments:
Post a Comment